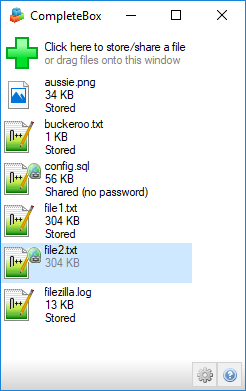
Storing a file with CompleteBox means that the selected file is uploaded to the server, but no URL is generated and the file is not available to anyone except its owner. Typically this is done for backup, or for a user to share their own files with themselves on two different computers.
To store a local file, the CompleteBox client must be installed on the local machine that files are being shared from, as described here. The main dialog is displayed by selecting the CompleteBox icon in the Windows system tray, shown below.
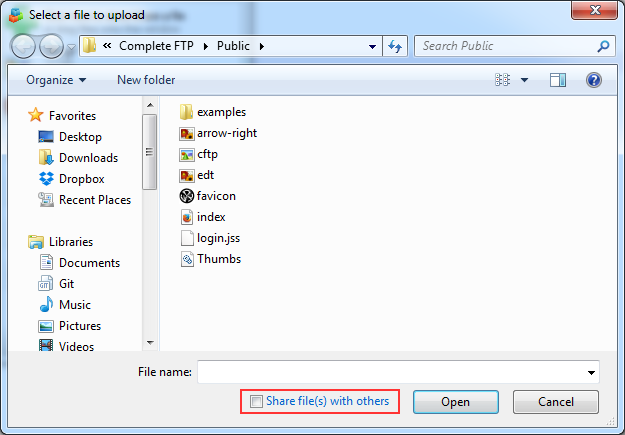
Click on the green cross to display a file open dialog box for selecting files to share, or drag and drop files onto the dialog. Make sure the "Share file(s) with others" checkbox at the base of the dialog is unticked as below (otherwise the file will be shared).
Multiple files can be selected in the file open dialog by holding down the control key and selecting each file. Once selected, the files will be stored on the file sharing server via a secure connection.
Note also that files can be drag and dropped onto the main CompleteBox window, and Windows Explorer has a menu item "Store in CompleteBox" which will store or share the selected files.
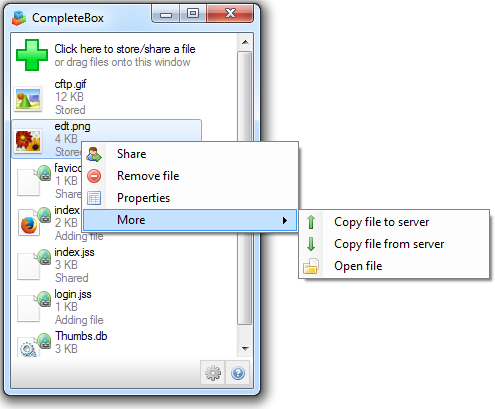
Right clicking on a stored file in the list will display the right-click menu shown below, which allows the stored file to be shared, the file to be removed, and the file properties to be displayed. Multiple files can be selected by holding down the control key and selecting each file. Control-A will select all files listed.
Additional options allow the forced copying of the local file to the server, or from the server to local file. This is in case you know the local or remote file to be the authorative one, and you want the other copied over, irrespective of which is the most recent file. You can also open the local file.